Hello! Welcome to the official Tallcraft armour stand guide! I am your host ThatOneLuke, and today I am going to walk you through how to make yourself some fancy lookin’ armour stand scenes. Before we go any further though I should mention our sponsors have asked us to tell you that armour stand editing is a VIP feature only! If you are not a VIP, this is not the guide for you my friend.
Right, still here? Fantastic. Let’s get down to brass tacks. See this?

This is your canvas, Vincent van Gogh, and this will be your brush from which you shall create masterpieces:

What you’re going to do now Da Vinci is right click your flint piece you have right there in your hand, and then a menu should appear:
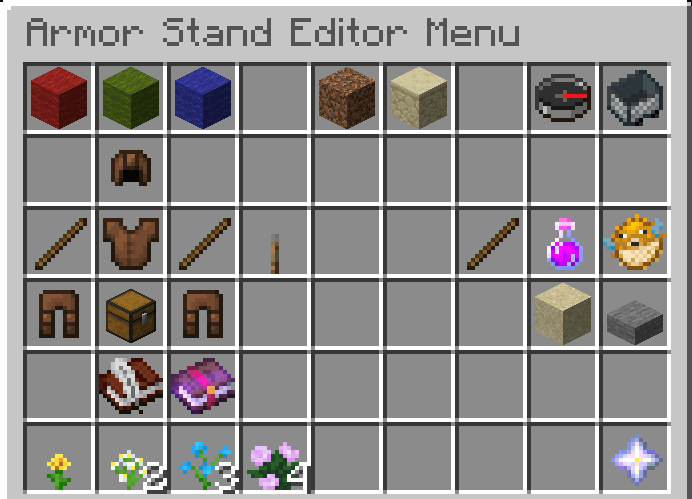
Now this menu? This is your everything now, capisce? All your answers to your armour stand questions are in this menu here.
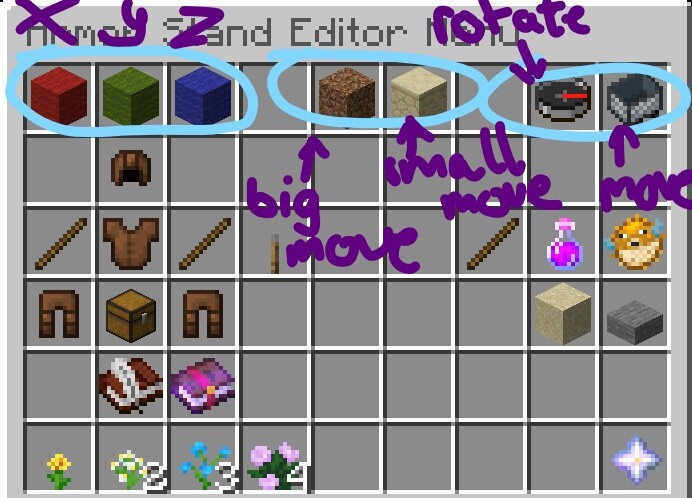
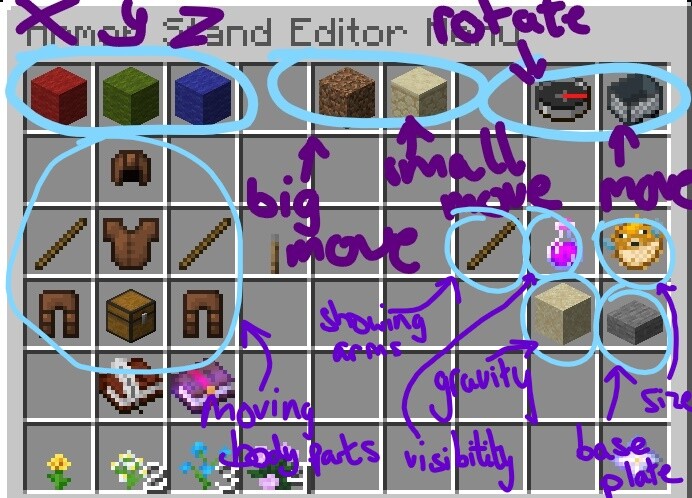
Let’s start at the top, the red, green and blue wool will move things by the X, Y, and Z coordinates respectively, but we’ll get back to that in due time. Next thing’s next is the dirt and sandstone block to the right of it. Now these bad boys are going to be VERY important later, trust me. These decide how much you move the armour stand. The dirt block means coarse adjustment, meaning that if you move an armour stand with that bad boy on it’ll move so far away it’s practically in another continent. By default movement level is set to coarse. The sandstone means fine adjustment. This means the armour stand moves in very small increments, so small that ants struggle to tell the difference. The final lil bit on the top layer are the compass and the minecart. The compass rotates the armour stand around in a circle, like that Dead or Alive music video and the minecarts moves the armour stand as a whole.
That’s where we’re up to so far class. Now, onto the fun stuff. We’re gonna move to the leather armour and sticks on the menu. These bad boys are your bread and butter for any real armour stand scene you want to make. The armour pieces correspond to what body part you’ll move. So the helmet moves the head, chest plate moves the torso, etc. So anyways, let’s say you wanna move the head of your armour stand. What do you do? Well my intrepid explorers, you’ll click on the helmet. Then you’ll click on the wool you want, let’s say the X axis (for argument’s sake here you’re wanting an armour stand looking down) and then you’ll exit the menu by pressing ye olde escape key, and you’ll right click the armour stand. Voila!
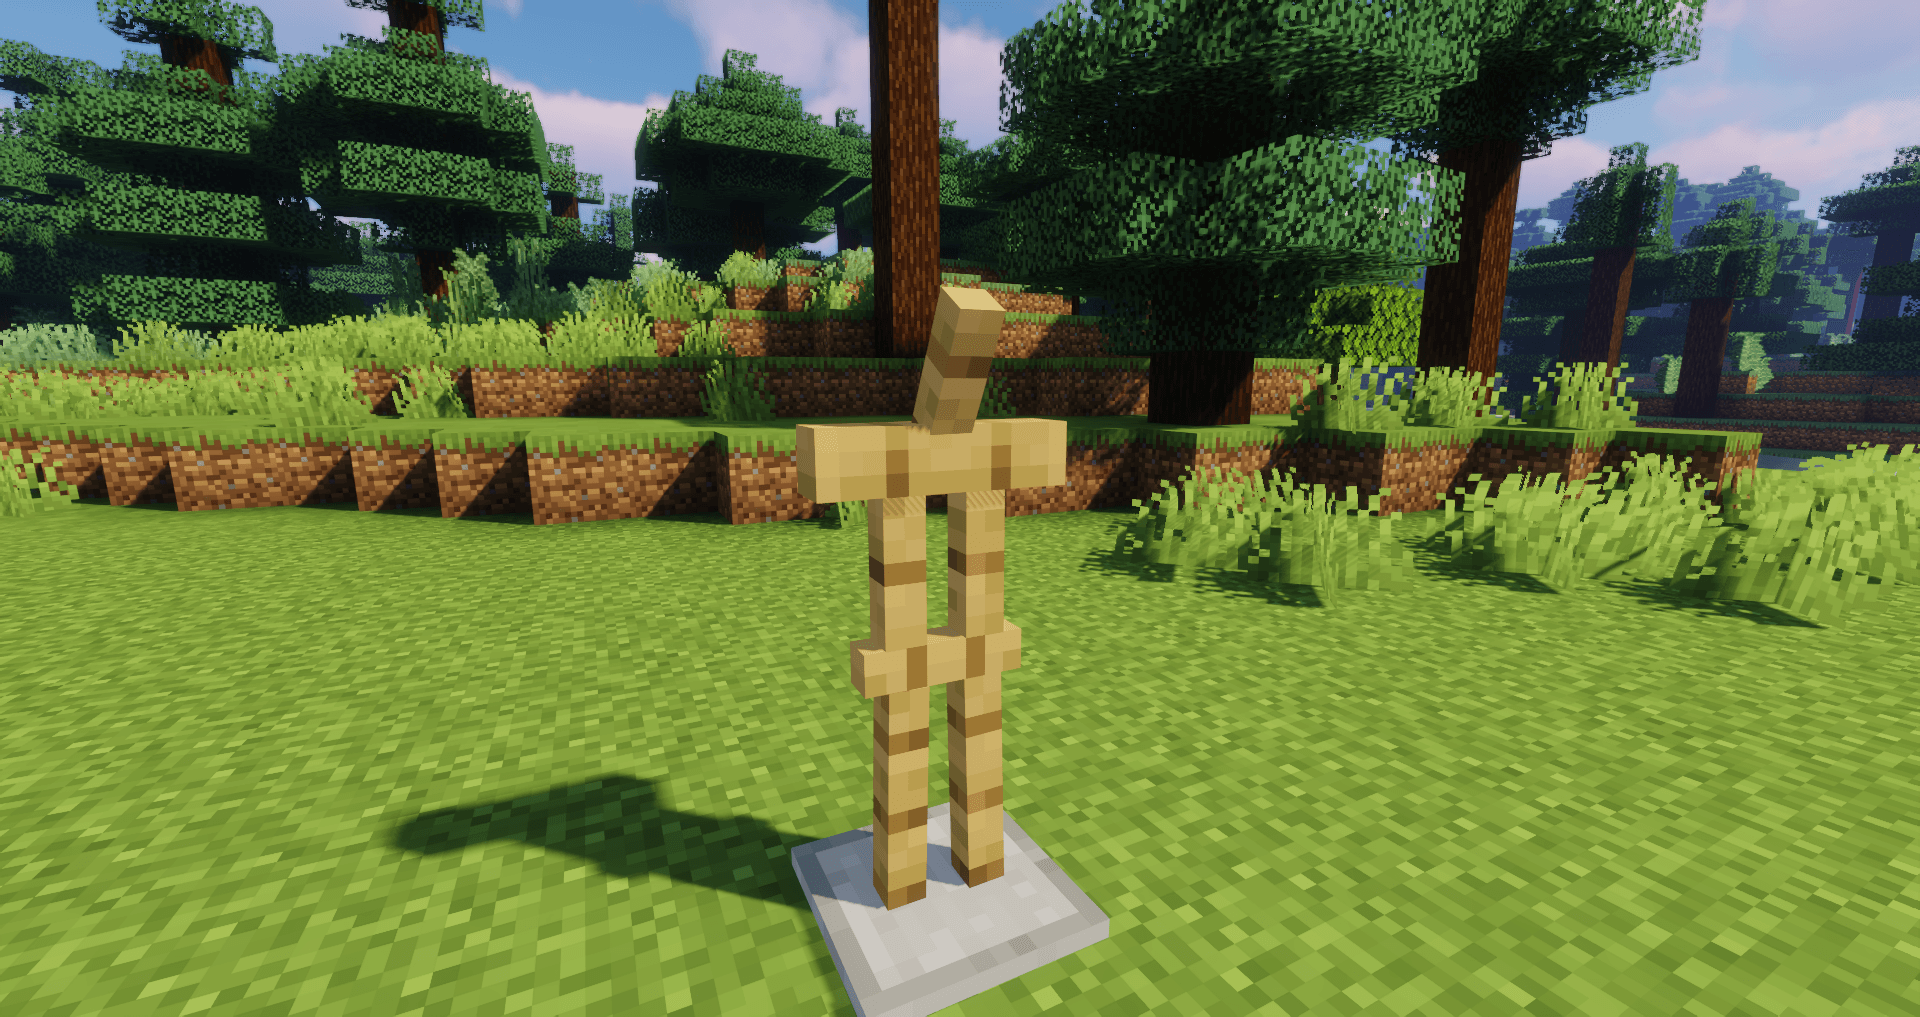
Look at that, it’s looking down. You absolute legend you did it. Then, if you wanted to change how his torso was situated, you’d do the same; click on the chestplate, click the wool you wanted, and then click on the armour stand. Genius!
Righty, from here we’ll move onto the last part of the menu worth mentioning. The astute amongst you might’ve noticed I’ve cunningly not mentioned what the stick, potion, pufferfish, sand block and stone slab are for. Welp, I’m glad you didn’t ask and ruin my guide plucky young sport. These bad boys are crucial stuff! The stick. It let’s you give armour stands arms! I know, human civilisation was building up to this. All you have to do it click on the stick and click on the armour stand.
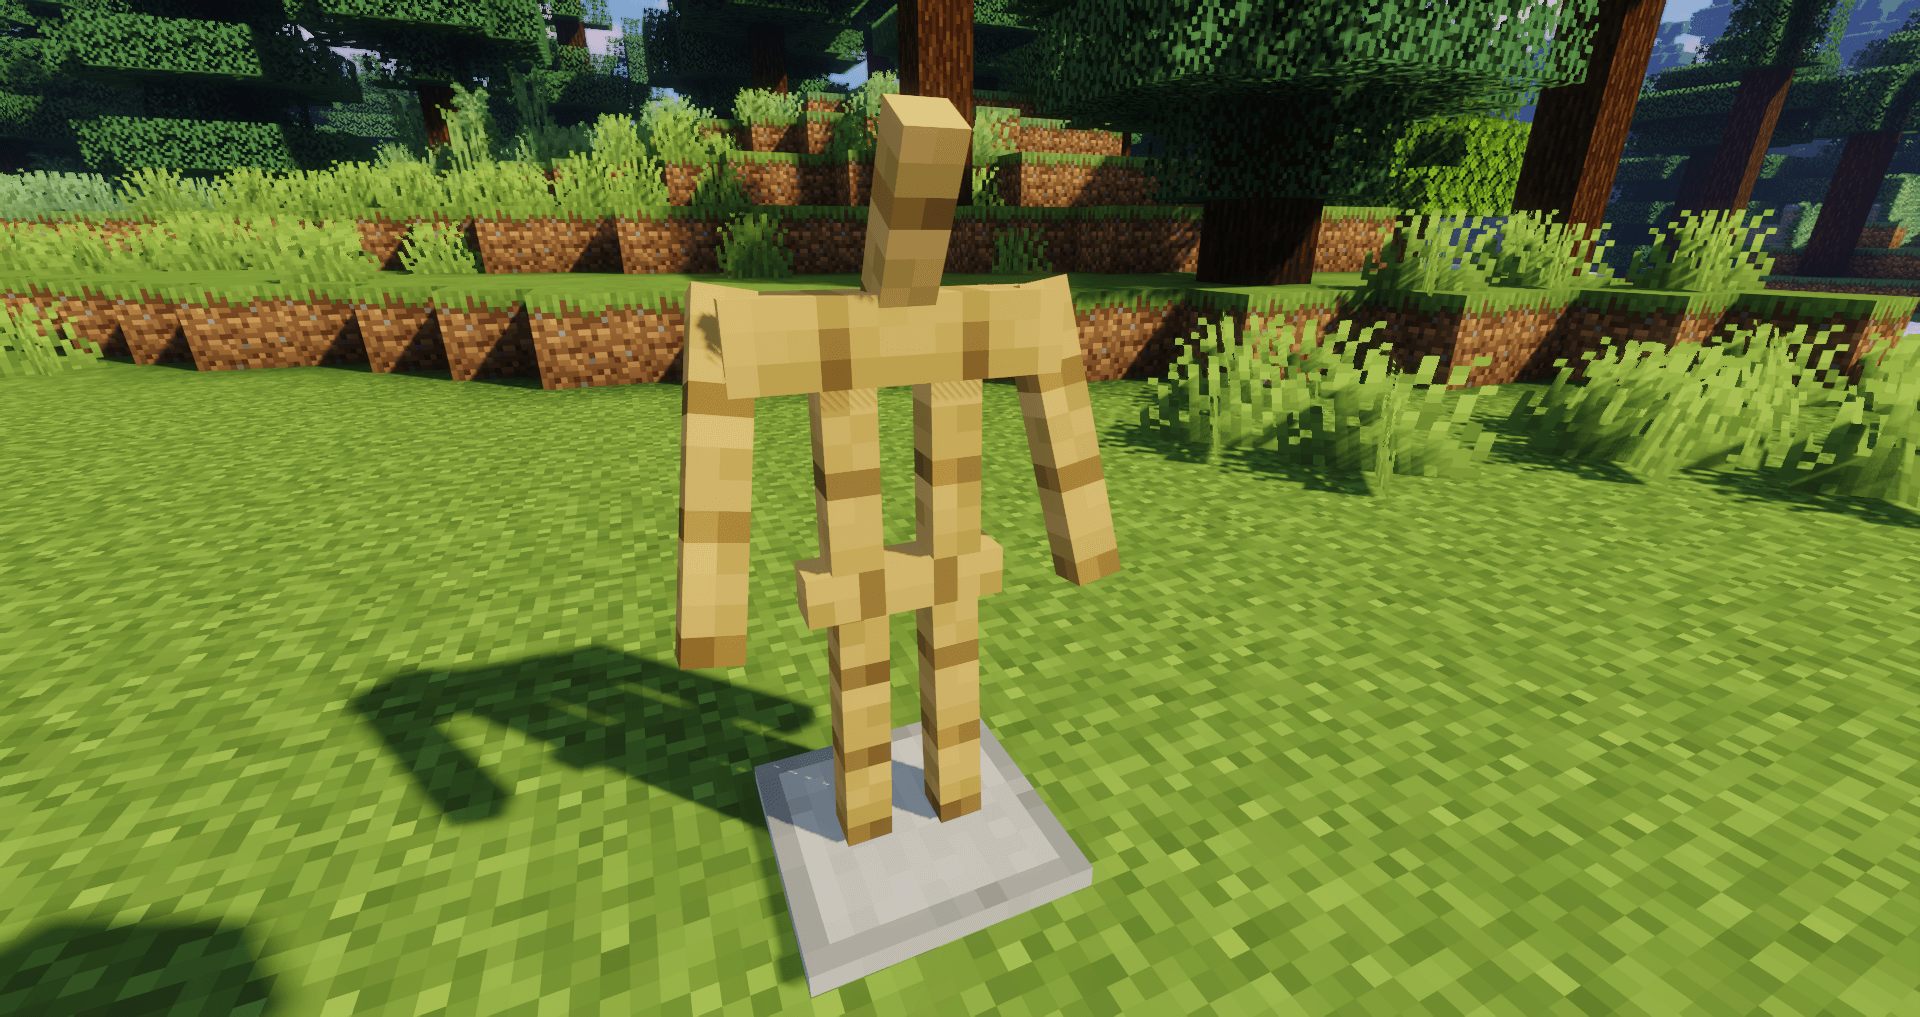
Look at it. It’s just so beautiful. Anyways, now that your mind has been sufficiently blown, let’s move on to what the others do. The potion makes the armour stand invisible. However, before you get too excited, this is a staff only feature. If you’re not staff, you can’t make armour stands invisible. Anyways, next up is the pufferfish. This absolute bad boy let’s you make your armour stands smaller. I know, game changer. To do this, you do the same thing as you did to show the arms, but click the pufferfish of course. Anyways, onwards and downwards to the sand block, which disables gravity, so your absolute unit of an armour stand can defy gravity itself. Finally you can have your floating T-posing statue of yourself watching over your base, like some supernatural scarecrow. Lastly but not leastly is the stone slab, which removes the little stone base plate on the bottom of the armour stand.
Here’s what we’ve covered in our little lesson today. any questions?
Yes, so here’s a FAQ
How can I remove arms / add a base plate / disables gravity etc.?
All you need to do is click on the appropriate icon again and then click on the armour stand.
What are the books below the body parts?
They copy and paste specific armour stand poses ( I basically never use them)
What about those there flowers down the bottom, and the nether star too?
They are to I believe permanently copy a certain pose for future use. The nether star is another help tool you could use, but then you wouldn’t get the charm of ThatOneLuke, would you?
How do I give the armour stand something in its left hand?
Click on the chest icon, that is the equipment tab. Then click your armour stand to reveal its equipment slots. Then just drag what you want into the left hand slot!
Anyways, that’s all we have time for today. Remember to smash that like button, subscribe if you haven’t already and ring that bell button to become one of our notification squad. Follow me on Patreon if you haven’t already, and also Twitch, Instagram, Facebook, LinkedIn, Twitter, Google+, MySpace, Snapchat, The Newspaper and you’re not reading anymore are you. Bye!
P.S Drop any questions below and I’ll answer them